
How To Install Outdoor WPC Deck Flooring & DIY Interlocking Deck Tiles
Outdoor surfaces—including rooftop terraces, poolside areas, garden pathways, and balcony decks—face the harshest conditions in Indian architecture: torrential monsoon rain, high humidity, blistering 45°C summer sun, and heavy foot traffic.
Natural timber decking (such as Teak or Sal) rots, splinters, and requires costly chemical oiling every year. Outdoor stone and ceramic tiles become dangerously slick when wet and radiate burning heat under direct sun. Green Plastwood WPC Decking solves both problems with engineered composite planks and snap-fit DIY deck tiles.
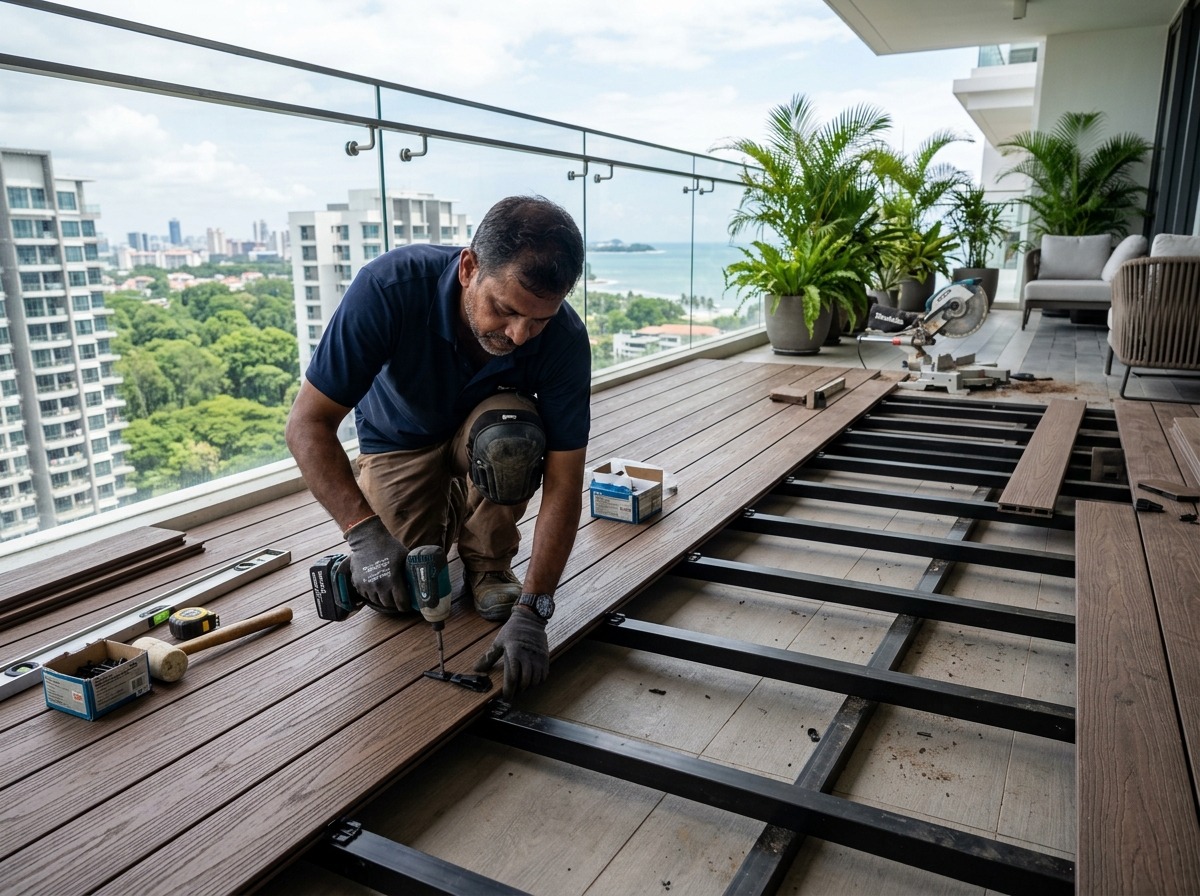
The Two Decking Systems Explained
1. Reversible Heavy-duty WPC Deck Planks (150 Mm × 23 Mm)
Designed for large outdoor expanses including swimming pool decks, hotel open-air restaurants, private gardens, and boardwalks. Each plank is 150 mm wide and 23 mm thick, available in 8 ft and 10 ft lengths. Planks are reversible: one side features a fine brushed wood grain, while the opposite side features grooved anti-skid ridges for maximum wet-traction around pools.
2. DIY 4-side Interlocking Deck Tiles (300 Mm × 300 Mm)
The fastest way to transform residential balconies, penthouse terraces, and courtyard seating. Each 300 × 300 mm tile is mounted on a heavy-duty polymer grid base with male and female connector tabs. No drills, glue, or screws are required—tiles simply click together like puzzle pieces directly on existing flat flooring.
Material Comparison: WPC Decking Vs Wood Vs Tiles
| Performance Factor | Green Plastwood WPC Decking | Natural Hardwood (Teak / Sal) | Outdoor Vitrified / Ceramic Tiles |
|---|---|---|---|
| Water Absorption | Water proof (will not swell, rot or warp) | 15% – 25% (Swells in rains, rots at base) | Less than 0.5% (Non-porous) |
| Wet Slip Resistance | High (Anti-skid ribbed or brushed texture) | Slippery when wet with algae growth | Extremely slippery when wet |
| Termites & Wood Borers | 100% Immune | Highly vulnerable without chemical spray | Immune |
| Barefoot Comfort | Splinter-free, barefoot safe, comfortable | Splinter hazard as wood weathers | Hard surface, radiates burning heat in summer |
| Fastening Method | Concealed clips (No screw heads visible) | Surface screws or nails that rust | Cement adhesive & grouting |
| Annual Maintenance | Occasional wash with water & mild soap | Mandatory sanding, chemical oiling & sealing | Grout replacement & pressure washing |
Green Plastwood points are from our Interior & Exterior catalogue. The comparison with wood and tiles is general guidance.
Step-by-step Installation For Deck Planks (150 × 23 Mm)
- Base Slope & Drainage: The concrete sub-floor must have a 1% to 2% gradient sloping away from the building to prevent standing water.
- Substructure Framework: Lay aluminium or WPC joists perpendicular to the deck board direction. Space joists at a maximum of 300 mm to 350 mm centre-to-centre. Fasten joists securely to the concrete with anchor fasteners.
- Starter Clips: Screw stainless steel starter clips along the outer boundary line into each joist.
- First Plank Engagement: Slide the side groove of the first deck plank firmly into the starter clips.
- Concealed Deck Clips: Insert Green Plastwood nylon or 304 stainless steel deck clips into the opposite side groove of the plank. Drive the clip screw partially into the joist below.
- Continuous Laying: Slide the next plank into the clips and tighten the screws. The clips automatically maintain the mandatory 4 mm expansion gap between planks.
- Butt Joint Expansion Gap: Where two plank ends meet lengthwise, leave a 4 mm to 5 mm gap to allow for natural thermal expansion. Each plank end must rest on its own independent joist.
- Perimeter Edge Trimming: Finish exposed deck borders with Green Plastwood WPC L-angle edge clips for a clean, architectural border.
Rule of thumb: Never screw directly through the top face of outdoor WPC deck planks. Always use Green Plastwood concealed clips—they keep the deck surface 100% splinter-free and screwless, while automatically providing the drainage and thermal expansion space needed in tropical climates.
How To Install DIY Interlocking Deck Tiles (300 × 300 Mm)
- Clean the Surface: Sweep the balcony or terrace floor thoroughly. Ensure the floor is reasonably flat and free of debris.
- Start at a Corner: Place the first tile in a corner with the male connector loops pointing outward toward the rest of the room.
- Snap Adjacent Tiles: Align the female pegs of the second tile over the male loops of the first tile and press down firmly until you hear them click into place.
- Pattern Selection: You can lay all tiles in one direction (linear) or alternate them at 90-degree angles to create a classic parquet basket-weave pattern.
- Cutting Around Pillars: If tiles need trimming around balcony railings or drainage pipes, simply cut between the bottom plastic ribs using a basic jigsaw or hand saw.
Common Questions
Does WPC Decking Get Too Hot In The Summer?
Like any outdoor material, dark surfaces absorb sunlight. However, Green Plastwood composite decking contains natural wood fibers that dissipate surface heat much faster than dense stone or glazed ceramic tiles. Lighter shades like Teak remain very comfortable underfoot.
Can Water Drain Under The Deck?
Yes. The concealed clip system automatically creates a 4 mm slot between every plank, and DIY tiles have an elevated grid base. Water flows freely through to the floor drain without ponding.
Can WPC Deck Flooring Be Used In Swimming Pools?
Yes. It is unaffected by chlorinated pool water, salt water, and chemical splash. The grooved surface provides excellent grip even with wet bare feet.